
Last night was a dear friend’s 30th birthday party. The theme was “Saying Goodbye to Her Roaring 20’s,” which meant figuring out a little themey dress-up! I did some hunting around Pinterest for inspiration, and realized quickly that if I wanted to do finger waves, I was going to need a lot of time and practice. And long clips, which I don’t have. So I decided to just use hot rollers and whip together a headband. Easy-peasy!
I did a search on Pinterest for “20s headband,” and these popped up:
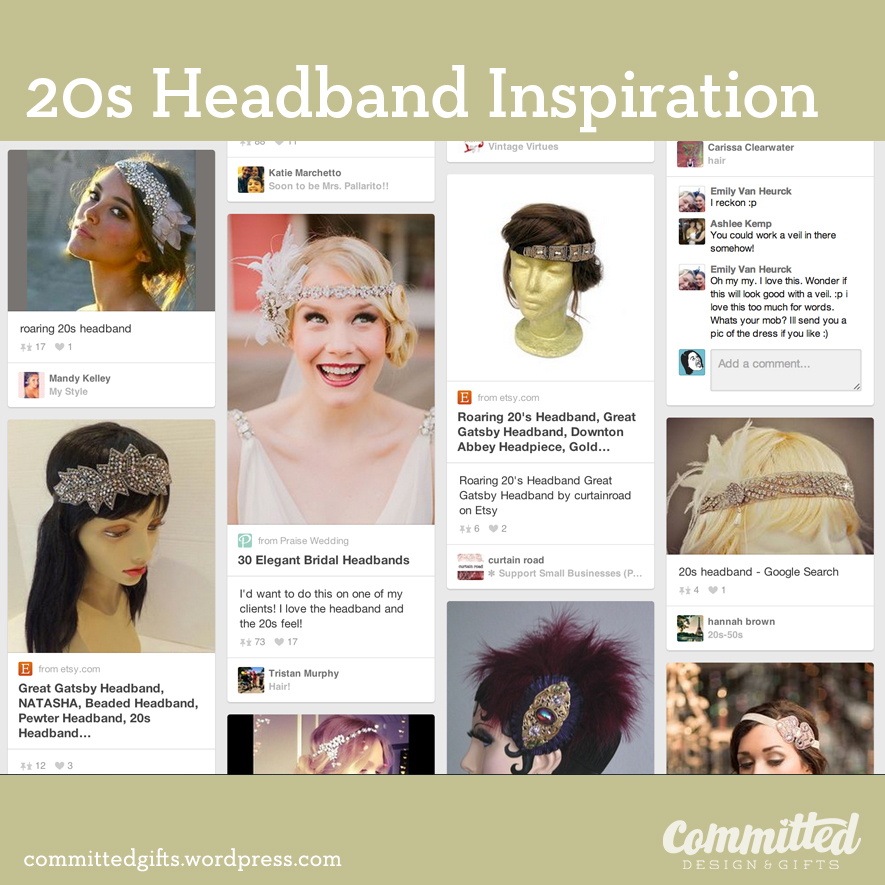
As you can see, it’s a lotta glitz, some nature-inspired shapes, and feathers if you’ve got ’em. Since I didn’t have any pretty elastic on hand, it took a few minutes to figure out how to incorporate a little stretch. My head is completely flat on the back, which means me and headbands usually don’t get along (everything just slides up off my head!). BUT. I figured it out.
Materials:
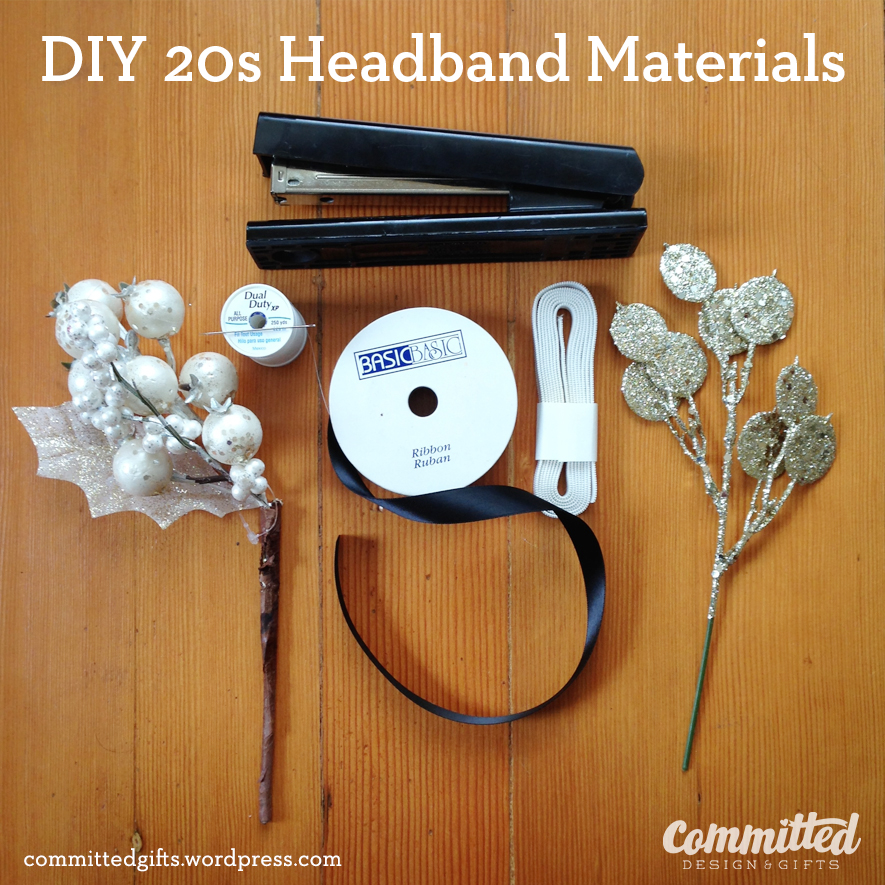
- Satin Ribbon
- Basic Elastic (same width or narrower than your ribbon)
- Stapler
- Basic Thread & Needle
- Glittery Decorations (these are from the holiday floral section at JoAnn)
- Scissors (not pictured)
How-To:
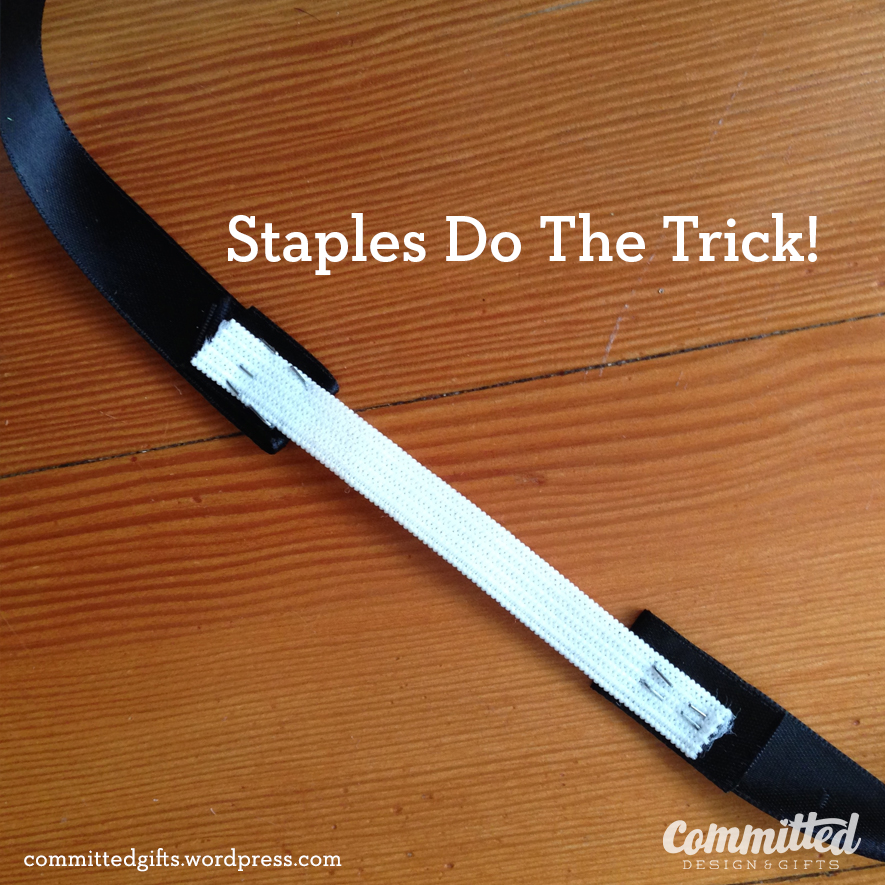
Step 1: Create the Band
I just used the ribbon and wrapped it around my head, then cut to length.
Cut a 2″ piece of the elastic.
Fold a 1/2″ piece of the ribbon under and staple to the elastic.
Fold under the other end of the ribbon about 1/2″ and try again on your head, placing the elastic so there’s a little tension (but not too much).
Staple the free end of the ribbon to the free end of the elastic to complete the loop.

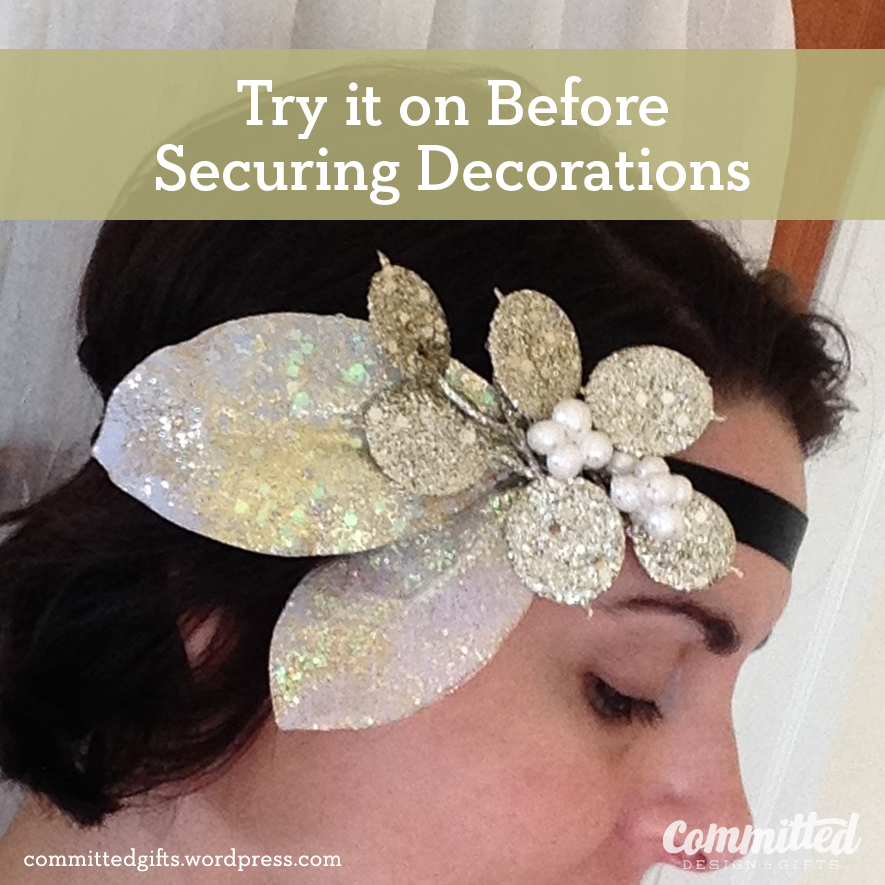
Step 2: Add Decoration
I cleaned out JoAnn Fabrics on Christmas Eve and grabbed all their glittery, feathery decorations from the holiday floral section at 70% off. I knew these things would come in handy some day! So chances are, you’ll still be able to find similar goodies in the silk flower section any time of the year. Sometimes I spot things like this at our local Goodwill, too, so there are affordable options for decorations.
I snipped off the leaves, gold things (not sure what to call them!) and pearls, leaving some length of the wires at the end. After arranging them how I liked, I pinned them to the ribbon and *carefully* tried it on to make sure it looked balanced.
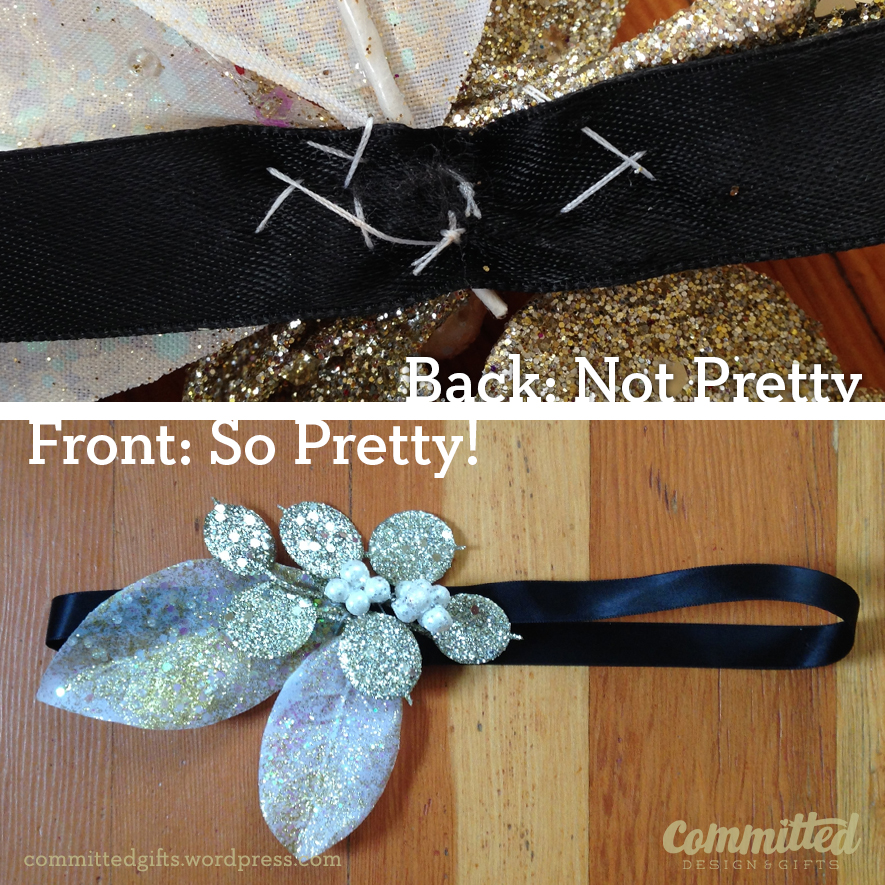
Step 3: Secure the Decorations
I just used regular thread and stitched directly to the ribbon. I made sure to stitch around the wires, and to do some stitches through the leaves and gold things themselves, to keep them in place. I didn’t use hot glue because (a) it’s messy, and (b) I didn’t know how secure it would be. You can see the stitches aren’t pretty, but it worked well, and everything stayed where it should. Plus, you couldn’t see it! Last step was to snip off any excess wires from the decorations and to tuck things in as needed.
And voila! From sweaty, dirt-crusted mama to roaring 20s flapper! It was a looser interpretation, but I think turned out pretty well for how little time and material I had on hand! Style your hair so a bit covers the elastic in the back, and nobody will know the difference!

The party was a blast, and it was so much fun to see our friends’ creativity with their outfits and accessories (hint: lots pearls!).
So cute!
Thanks! And thanks for stopping by!