
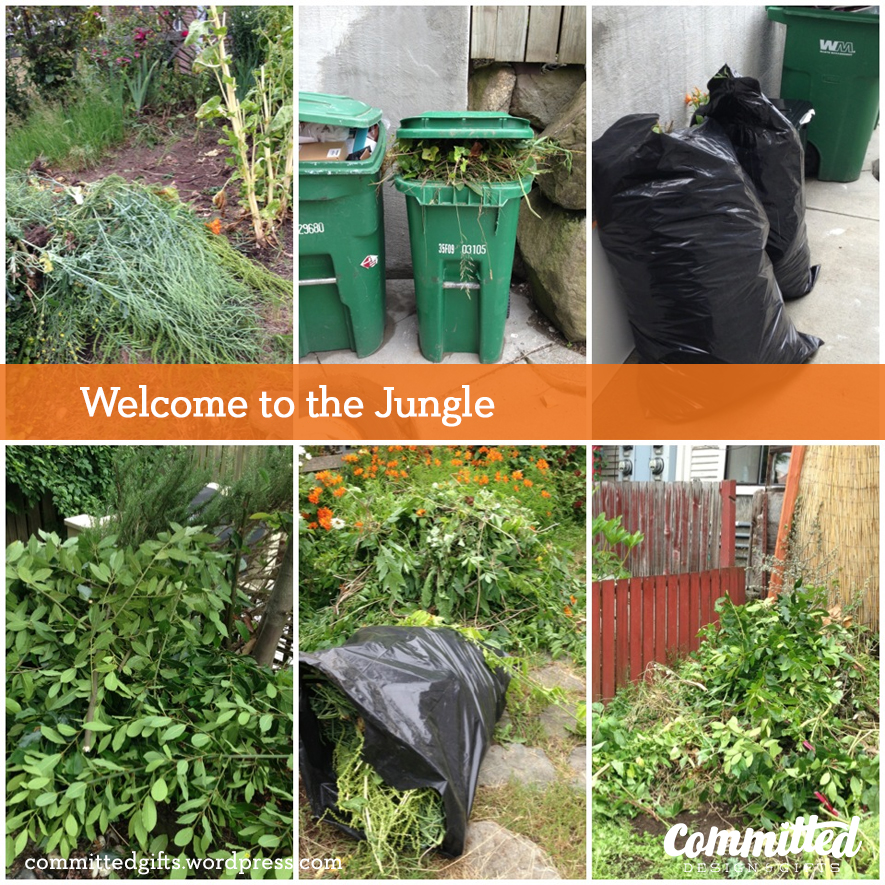
I’ve posted about our crazy garden before. The previous homeowners were very conscientious organic gardeners and had worked their way up to a self-sustaining edible and flowering garden. It was amazing when we first saw the house, then it quickly became a tangled, invasive jungle. I mean, kale growing 6′ tall. Bushels of flowering broccoli (aka, beyond edible). And then the morning glory, wisteria, alstrumeria, Chilean jasmine, midnight berries, and others that were just TAKING OVER. (Doesn’t it sound like I know something about plants? I don’t. I just fake it.)
I thought I could handle it myself. So I pulled, chopped, yanked for about 12 hours straight. And managed to tweak my neck to immobility for a week. Fail. Oh, and all that overgrowth came back in a few weeks! Plus some!

Next we tried hiring gardeners to come out and pull, trim, and tame everything back. A hefty sum of money (ahem, equivalent to RENT), and six weeks later, it was all back with a vengeance.
My next plan was to hire a garden consultant from Seattle Tilth to help me create a plan to make it more sustainable. And by sustainable, I mean, not spending 30 hours per week maintaining some level control over the growth. So what she proposed was flame weeding the stone paths, and then this method for taming the rest.
Taming your Jungle (the Sane Way)
- Decide what area bugs you the most. It may not be the most visible to the neighborhood, but if it bugs you, you’re motivated to tackle it.
- Work on a small area at a time (approx 3′ x 2′). This sounds like so little, but with the invasive weeds, it really was about the amount of work I’d want to do in one go.
- Again, just stick with that area until it is FINISHED. Don’t pull weeds over your entire yard, then go back and prep for planting. You’ll NEVER stay on top of it. Trust me.
- Pull the weeds.
- Add some nutrients to the soil (compost, organic booster, whatever your soil needs to give some love to plants).
- Plant your desired plants, trim back the ones you want to keep.
- Cover ALL dirt (up to the stems/trunks) with cardboard. Yes, cardboard. This is an amazing weed blocker! It’s water permeable and it decomposes after a couple of years so you can re-till and re-compost after a few seasons. Not after a few weeks. Oh, and it’s free. Just hang on to shipping boxes or raid a dumpster behind your local supermarket. If there’s tape on it, don’t sweat it. When you dig in next time, you can pull it out.
- Stake down the cardboard in tricky areas (like our front rockery…you don’t want it poking out, looks cheap.)
- Cover with several inches of mulch or compost. A good guide is to use the thickness of the compost bag, which is about 3″. I used Cedar Grove compost, which closes the loop in Seattle yard waste collection, and is occasionally offered at 3-for-2.
- Install your drip line, water regularly. Watch your PLANTS, not your WEEDS grow!
- Move to the small next area.
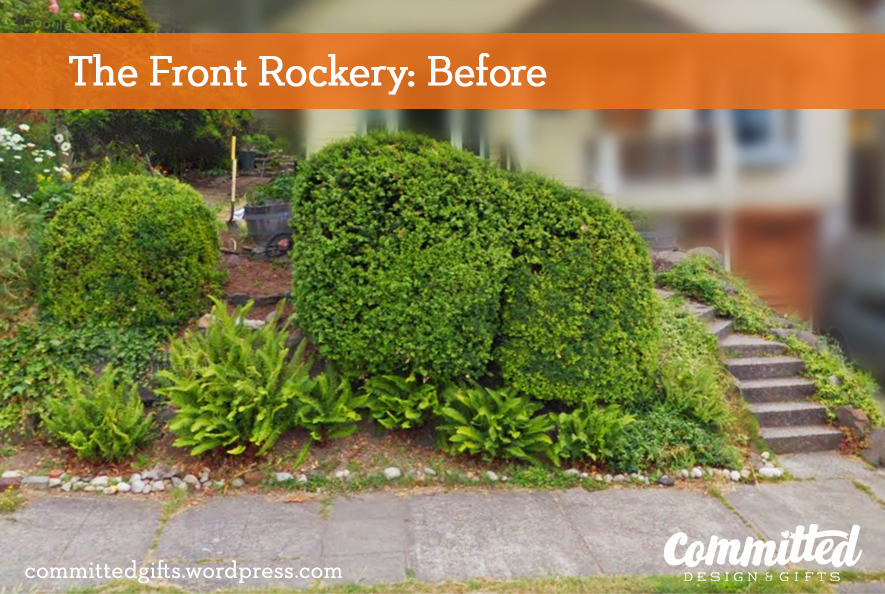
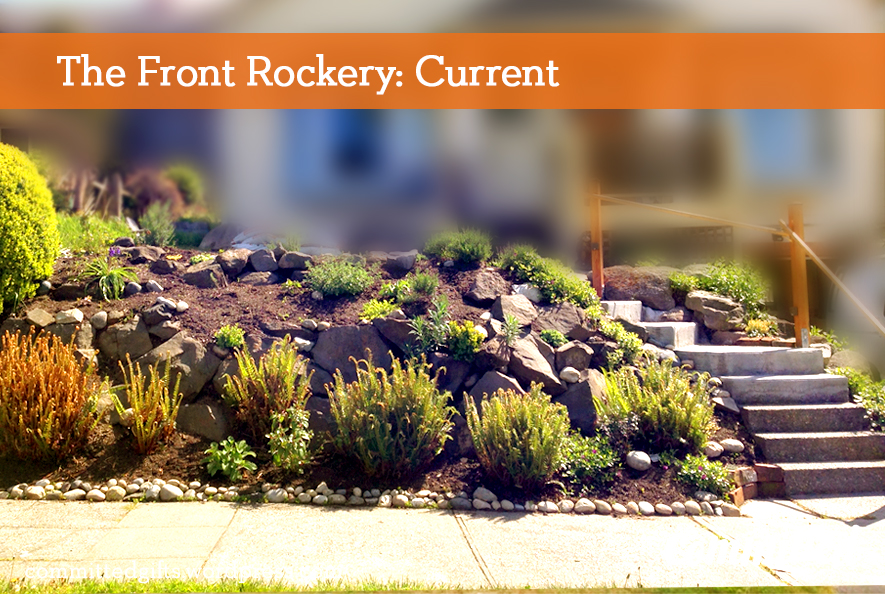
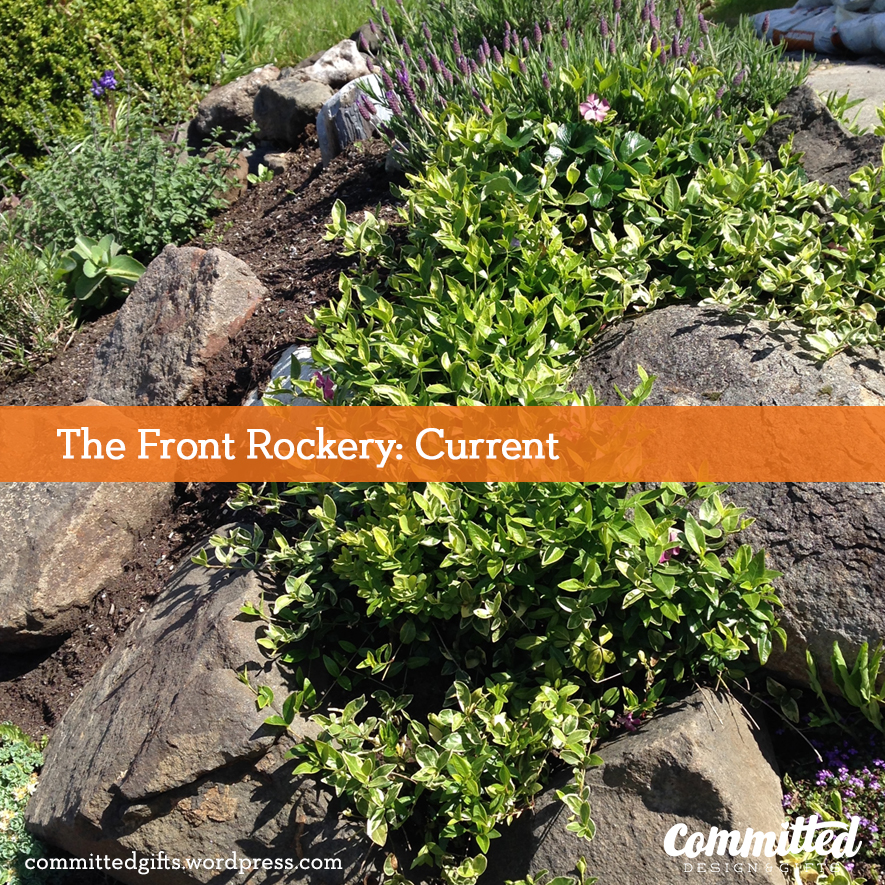
So I took her advice. This was last fall. What bugged me most was the rockery flanking our driveway and along the sidewalk. It was a mess, but had great potential. I did a lot of Pinterest searching and took some of the consultant’s advice to stick in varieties of thyme (edible, great ground cover, spreads well, and keeps a low profile). It took about 2 weeks of a few hours every few days, but it was done!
I waited to share the results here because I wanted to see how things held up over the winter. We’re now well into spring and growing season, and as the rockery goes, it’s held up really well! I only needed to spend about an hour tugging a few weeds. The big effort was cutting back the ferns once the fiddleheads started to pop up. That was another couple of dumpsters’ worth. But worth it. Are you ready for the result? You’ve been so patient…
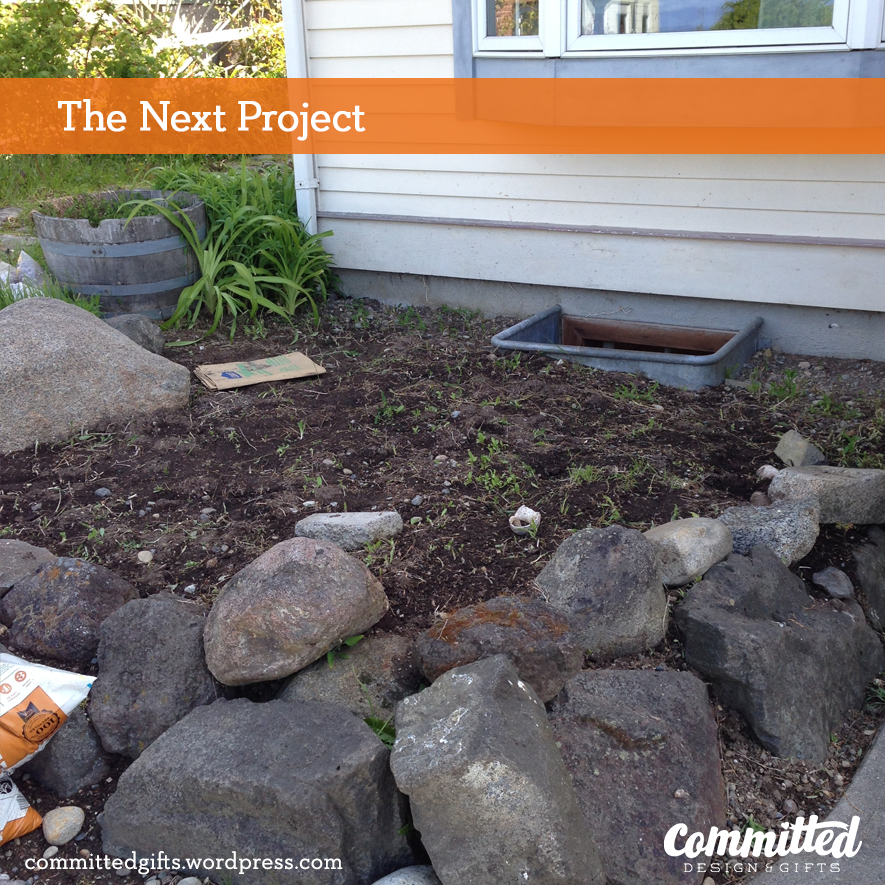
Encouraged by these results, and the beautiful weather we’re getting this week, I decided to tackle another area. We have a small plot in front of the front window (above street level, but visible when you come up the front steps) that’s dying for a makeover. It was completely overgrown by alstroemeria, which are beautiful, but grow rampantly and choke out everything else. We pulled them all, and they all grew back. So. This week, I’m digging this up, planting new stuff, and doing the mulch thing again, hoping for the best!

Let’s be honest, there is still 75% of the yard awaiting maintenance, but I have to stick to the mantra: “Start a small area, finish a small area, THEN move on.”
What spring project are you starting this week?
Linked to: Elizabeth & Co. | Monthly Garden Party
Oh I love being able to see all the rockery and the way the plants meander through the rocks!
Me too! It takes a little more maintenance, but looks so pretty! Thanks for stopping by!
Hmmm…it is winter here now so our garden is wet and green. I wonder if it’s a good idea to fertilize it and cover it with cardboard and wait until spring? The cardboard is likely to turn into a soggy mess though. Is that OK?
Hm. It’s okay for it to turn soggy once you’ve planted and covered with mulch–that’s the idea. I’d say for wintering, maybe something a little more substantial to protect the soil. I did use burlap for our last garden–treated the soil, then covered with burlap for a few months until I was ready to plant. When I pulled it up, the soil was fine and there were only a few small weeds poking through, so I’d recommend trying that until you’re ready to plant! Then go to town with the cardboard and mulch. Thanks for stopping by my blog!